1. Login into WordPress panel.
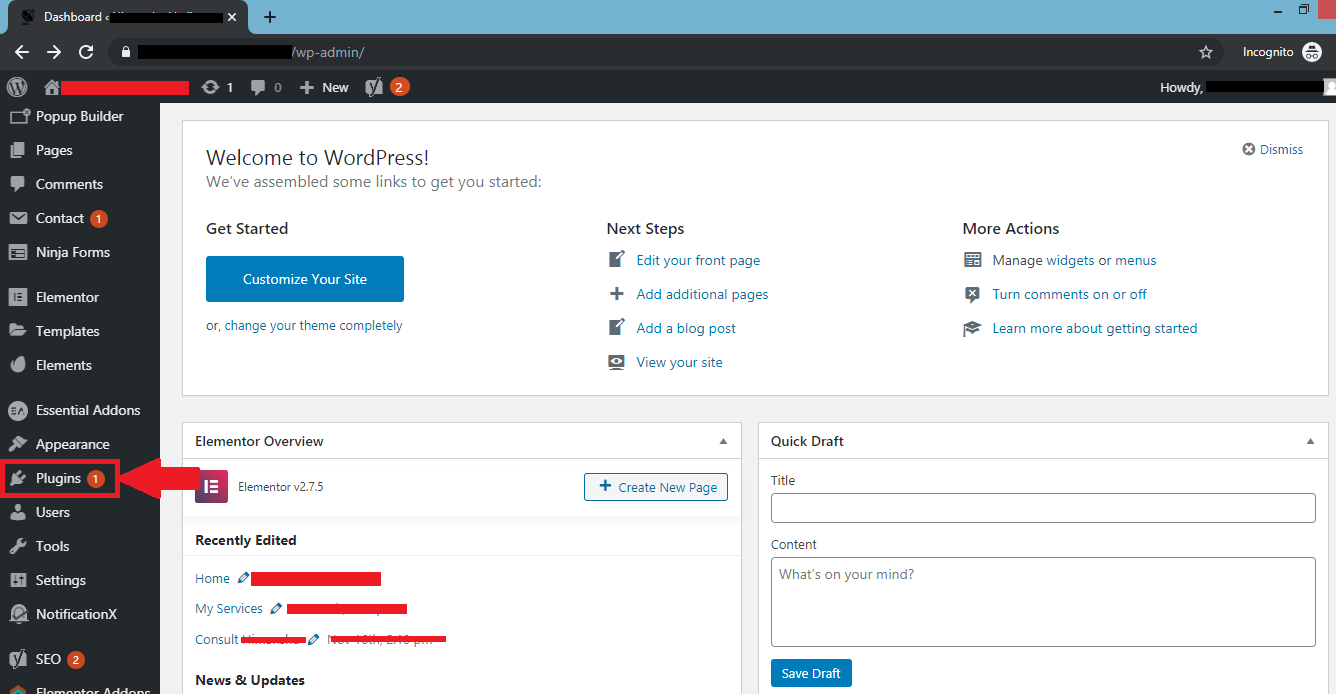
2. Select "Plugin" option in the Dashboard of WordPress.
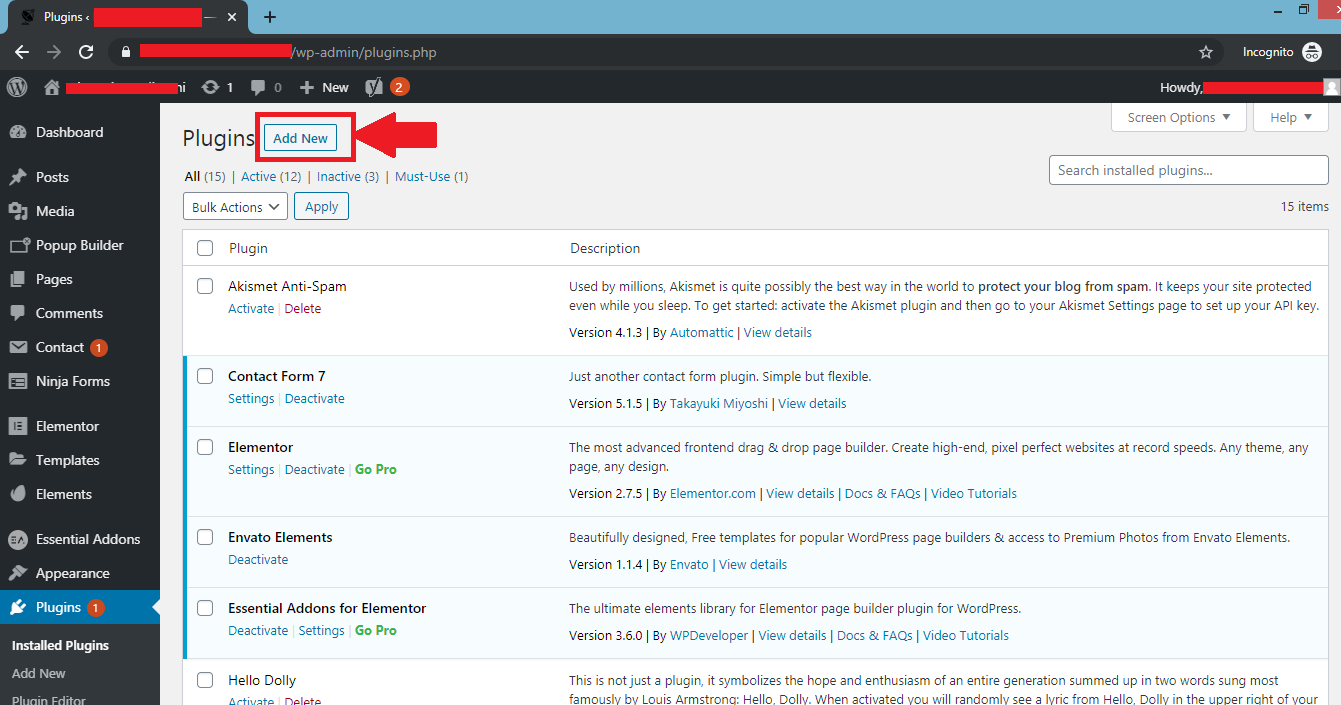
3. Select "Add New" option in "Plugin" section.
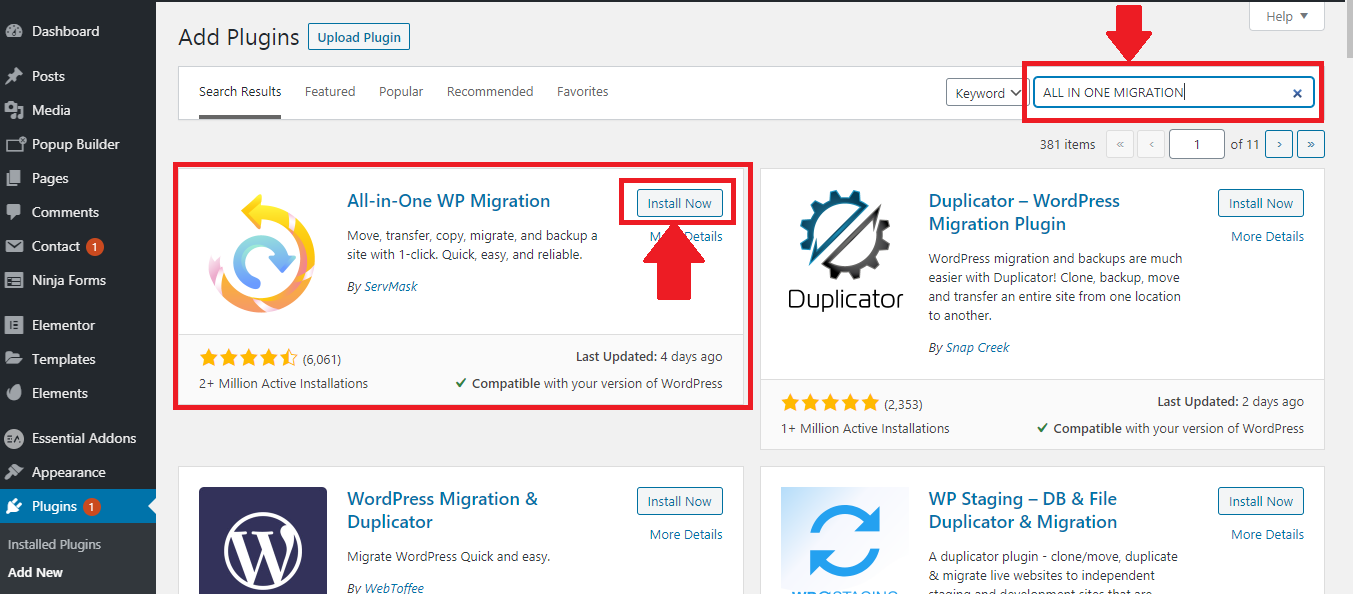
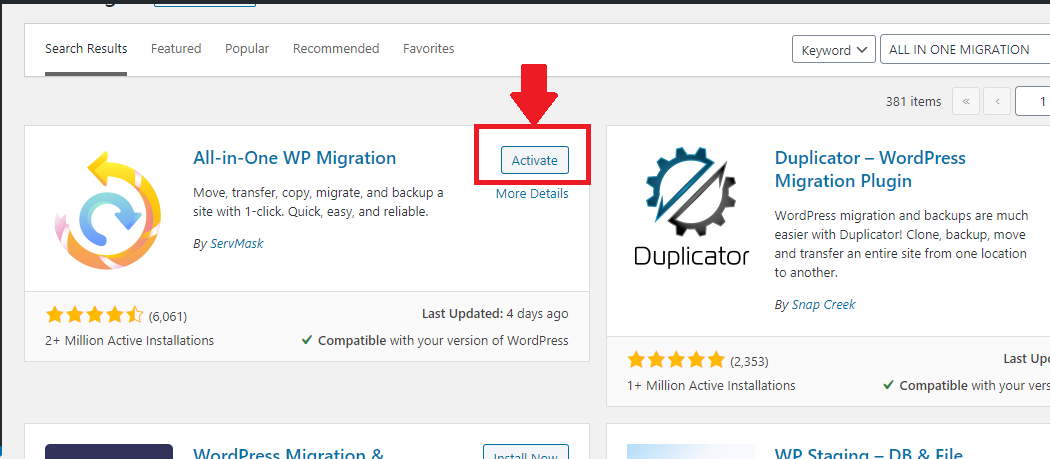
4. Search for "All-in-One-WP Migration" in the search bar and click on "Install Now" option in the plugin.
5. Click on "Activate" option and then All-in-One-WP Migration plugin has been installed.
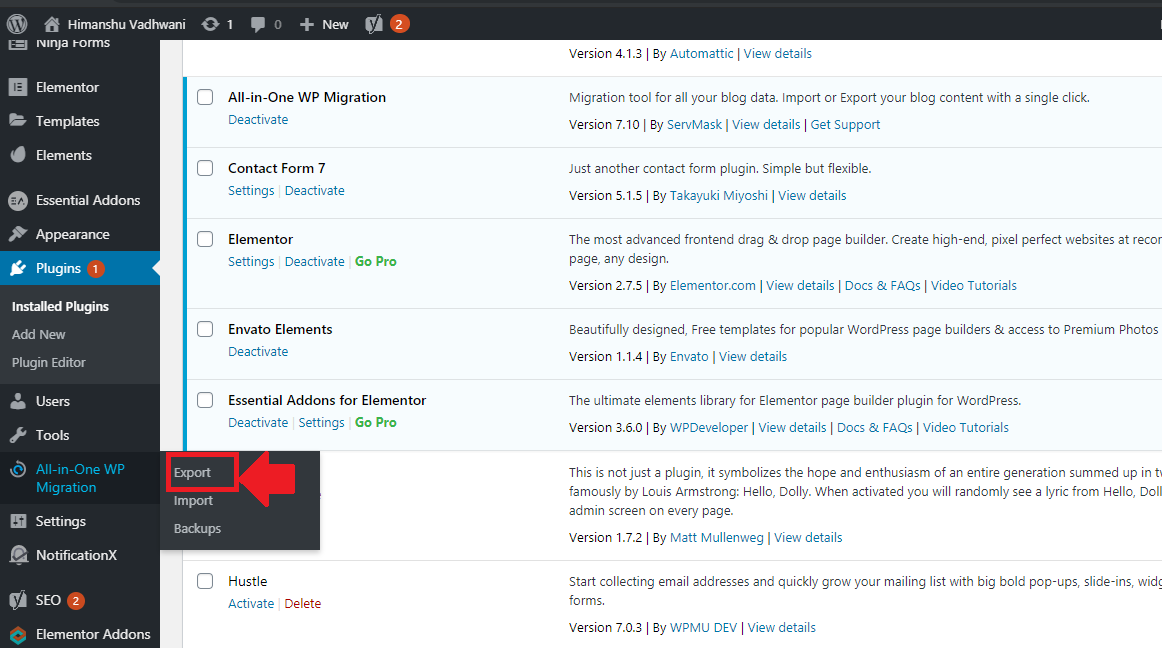
6. Select "All-in-One-WP Migration" and click on "Export".
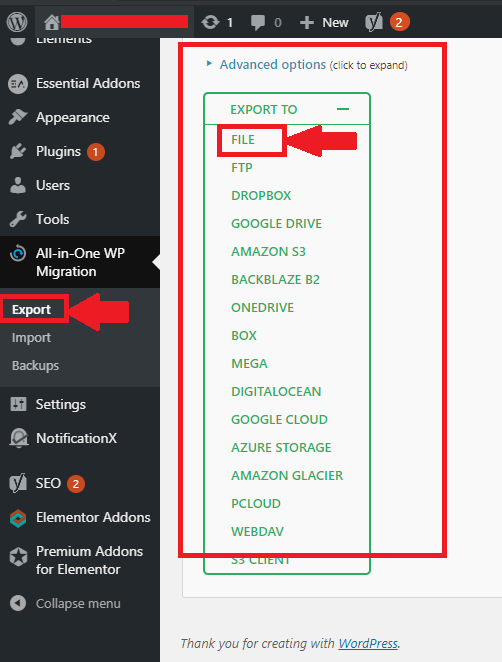
7. Select "FILE" option from multiple menus.
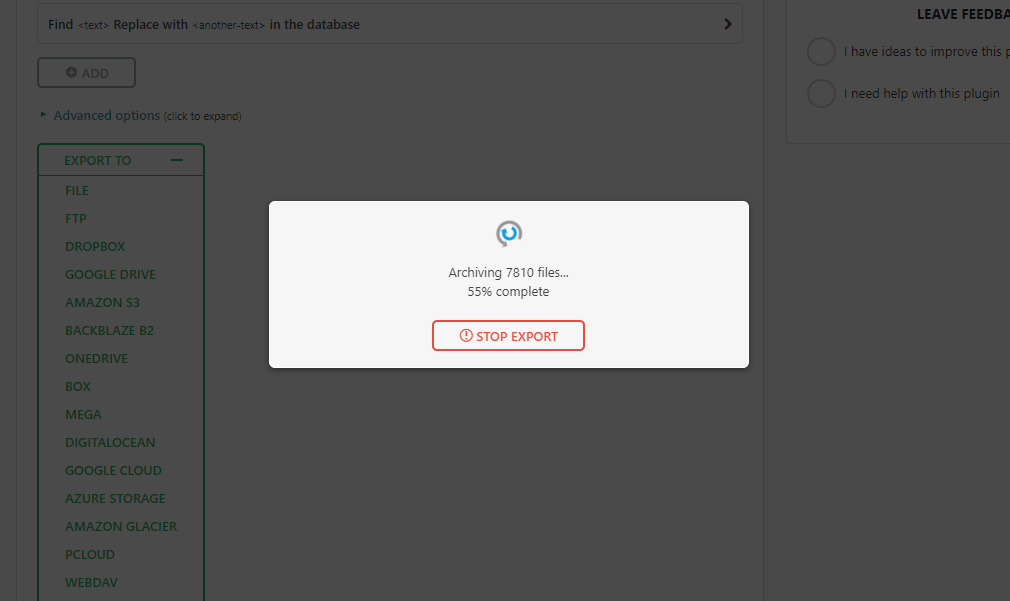
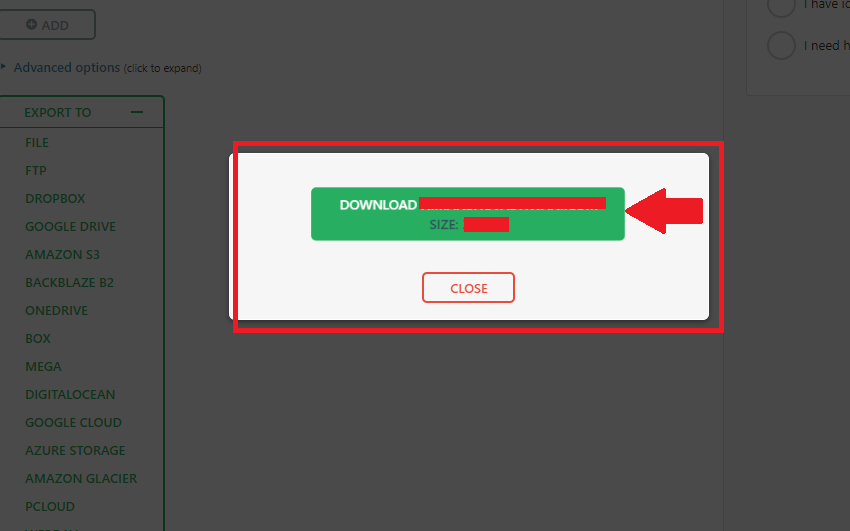
8. Now you can see that the process of Backup will be started.
9. Your Backup has been created and now you had to download it only.
2. Select "Plugin" option in the Dashboard of WordPress.
3. Select "Add New" option in "Plugin" section.
4. Search for "All-in-One-WP Migration" in the search bar and click on "Install Now" option in the plugin.
5. Click on "Activate" option and then All-in-One-WP Migration plugin has been installed.
6. Select "All-in-One-WP Migration" and click on "Export".
7. Select "FILE" option from multiple menus.
8. Now you can see that the process of Backup will be started.
9. Your Backup has been created and now you had to download it only.
Was this answer helpful?
Also Read
-
Create Cron Jobs in Directadmin panel Open or Close
1) Login into your User panel.2) In "Advanced Features" section, click on "Cron Jobs". 3)... Read More
-
Change password of mysql database in Direct Admin Open or Close
1. Login in your User Panel.2. In "Account Manager" Section, Click on MySQL Management.3. Now,... Read More
-
How to download mysql database backup in Directadmin Open or Close
1. Login into your user Direct Admin Panel.2. In "Account Manager" section, Click on "MySQL... Read More
-
Create FTP accounts in Directadmin Open or Close
1) Login into your "User Panel"2) Select "FTP Management" in "Account Manager" section.3) Click... Read More
-
How to add sub domain in directadmin panel Open or Close
1) Login into your User panel.2) Select "Subdomain Management" in "Account Manager" section.3)... Read More