NOTE: Use Hybrid Skin for below Article
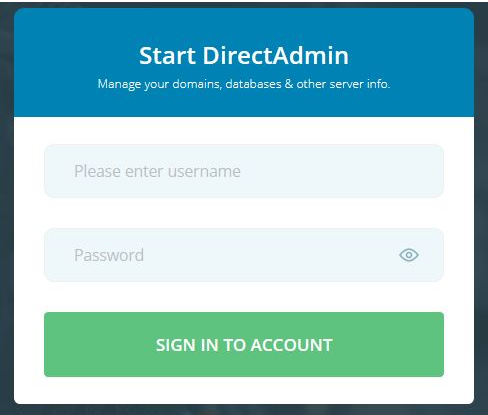
1. Login into your User account.
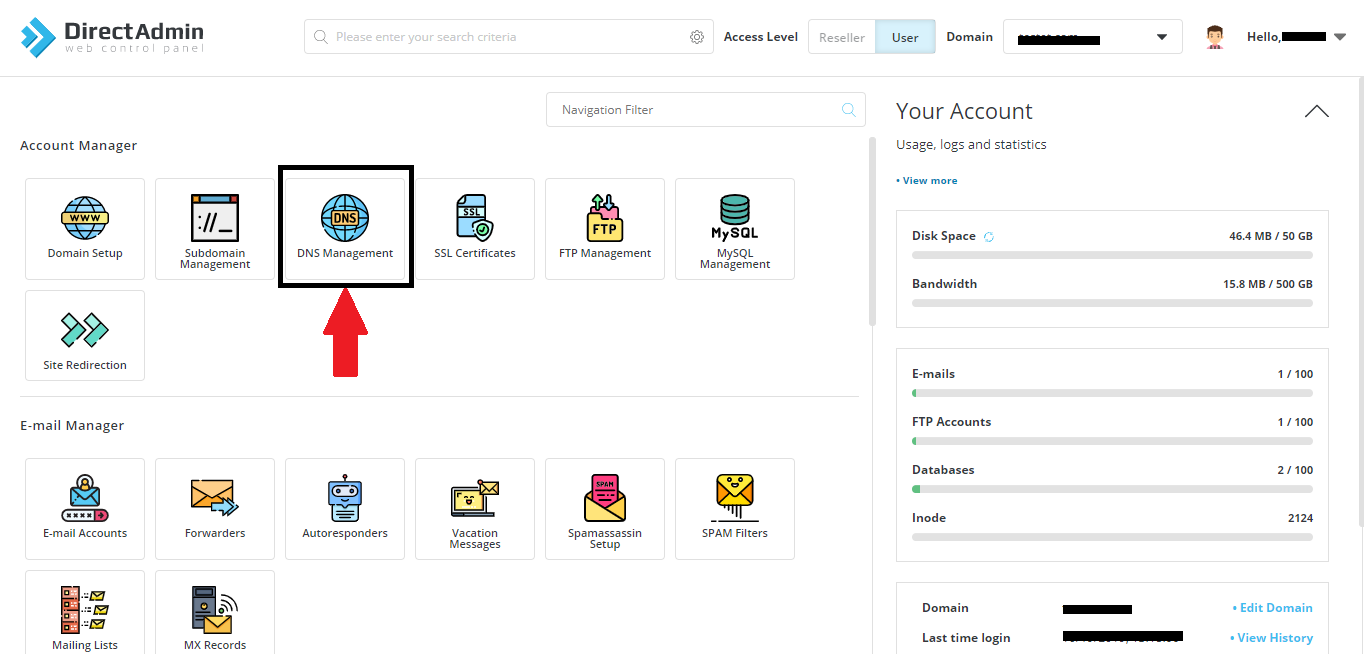
2. In "Account Manager" Section, Click on DNS Management.
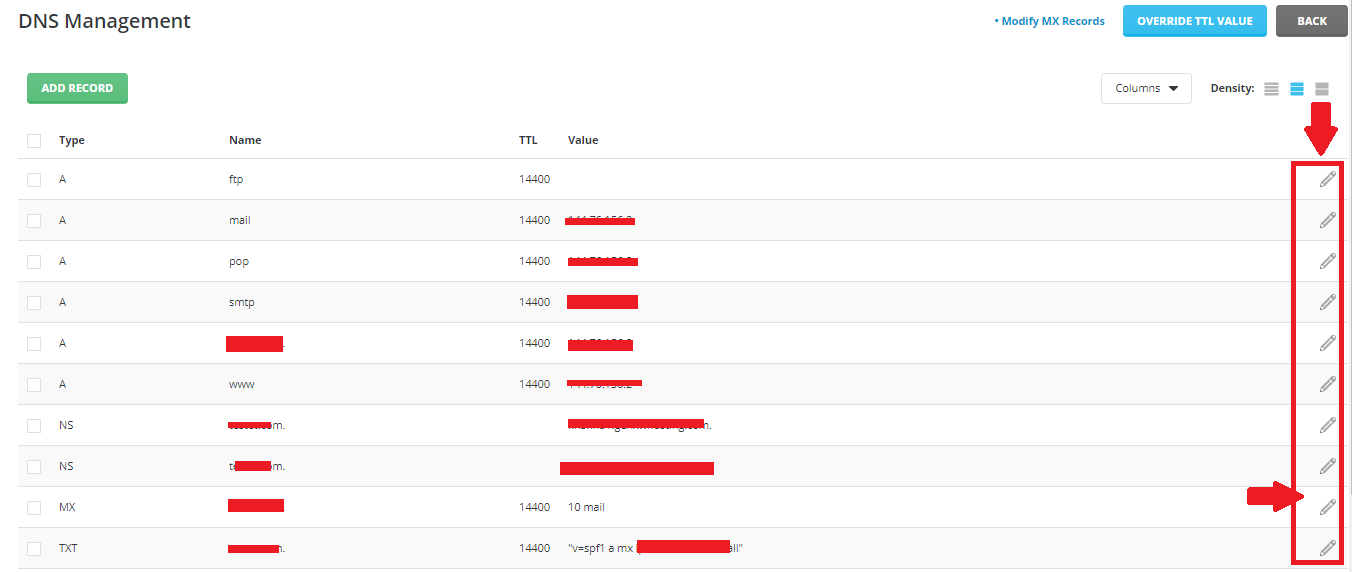
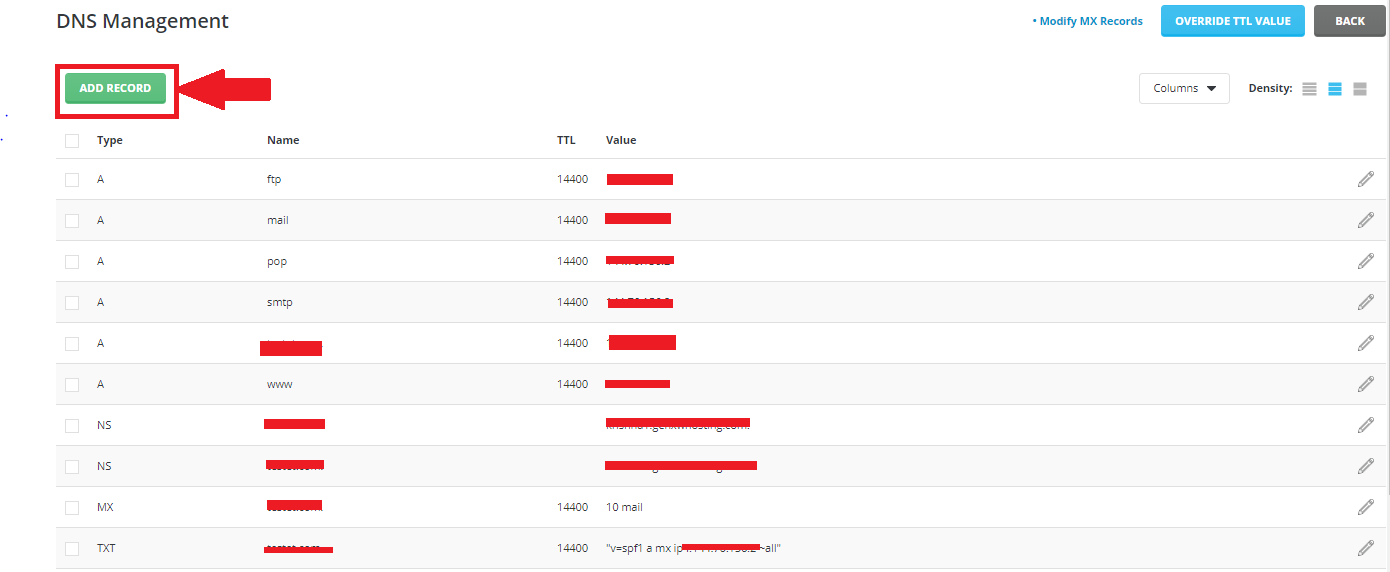
3. Now list of records will be shown. Click on the edit icon of the records on left to modify the contents.
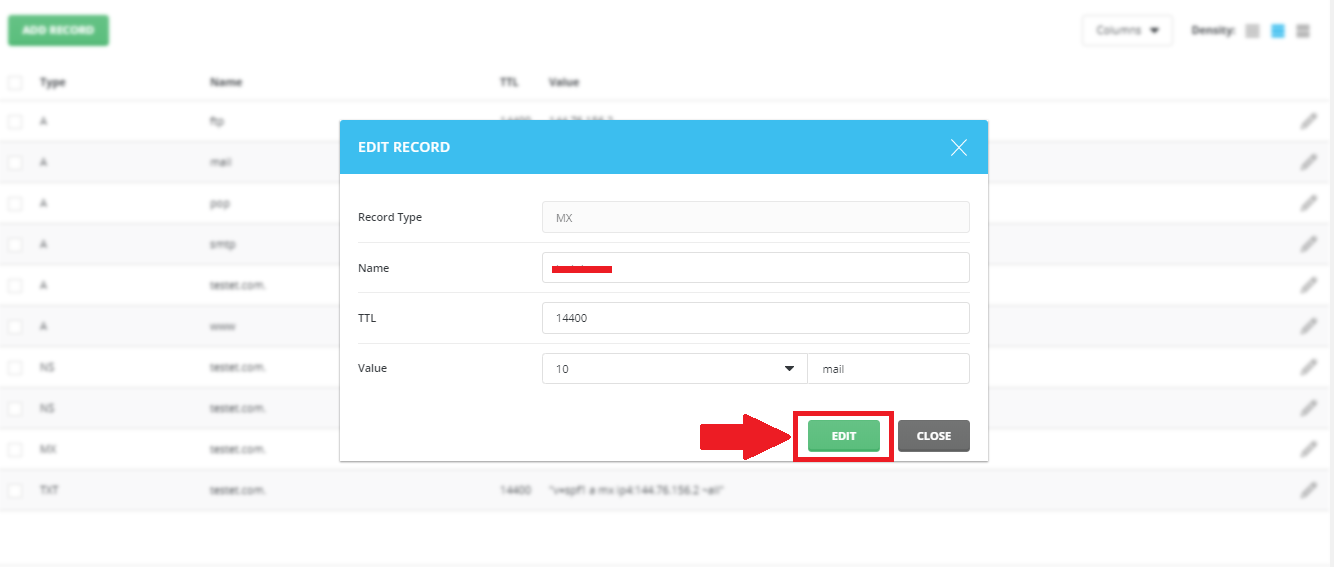
4. Enter your new records and click on "EDIT".
5. Success Message will be shown. Your new records has been updated.
6. To add new record, click on "ADD RECORD".
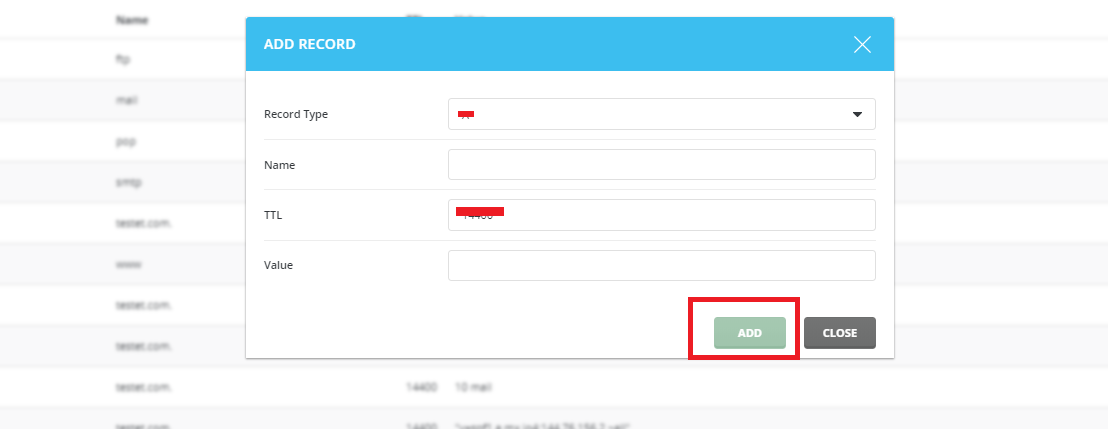
8. Enter your new records and click on "ADD".
9. Success Message will be shown. Your new records has been updated.
NOTE:- Put a dot(.) after the DomainName in the Name and Value section.
1. Login into your User account.
2. In "Account Manager" Section, Click on DNS Management.
3. Now list of records will be shown. Click on the edit icon of the records on left to modify the contents.
4. Enter your new records and click on "EDIT".
5. Success Message will be shown. Your new records has been updated.
6. To add new record, click on "ADD RECORD".
8. Enter your new records and click on "ADD".
9. Success Message will be shown. Your new records has been updated.
NOTE:- Put a dot(.) after the DomainName in the Name and Value section.
Was this answer helpful?
Also Read
-
How to reset the password of the user Open or Close
1) Login into your Reseller Account.2) Go to "Change Passwords" in "Account Manager" Section.3)... Read More
-
Switching between Skin/Theme in Direct Admin Open or Close
1. Login in your Directadmin panel.2. Click on right top of your directadmin reseller panel... Read More
-
How to change password of email accounts in Directadmin panel Open or Close
1) Login into your User panel.2) In "E-mail Manager", section click on "E-mail Accounts".3) Click... Read More
-
How to Create Backup in DirectAdmin Panel Open or Close
1. Login into your User Panel.2. Click on "Create/Restore Backups" in "Advance Features"... Read More
-
Add Domain in DirectAdmin user Open or Close
1. Login in your DirectAdmin User.2. In "Account Manager" section click on "Domain Setup"3. Now,... Read More